Showing posts with label DIY. Show all posts

Wednesday, 15 March 2017

Upcycling Ideas From Personal Creations

I ended 2016 by buying my first home and have spent the first few months of 2017 getting settled. Now that I have my place set up the way I want it and functioning the way I need it, I can focus on decorating and adding personal touches.

My goal for my home is to be organized, functional, and minimal; I want everything to serve a purpose or to bring me joy. A great way to accomplish one or both, is to upcycle!

New Uses for Old Things
Image Via
Personalcreations.com has gather 50 ideas for upcylcying items into something new. I personally like the idea of using shopping bags to organize items- finally a use for the Lilly Pulitzer bags that are too pretty to throw away!- and repurposing telephone handsets as bookends. You can find the full list, including links to instructions, here
 
Happy Upcycling! 

Thursday, 16 April 2015

Baby Shower Part 6- A Special Keepsake

About a year and a half ago, I hosted a 'Bedtime Stories' Baby Shower for a dear friend of mine. Even though the actual baby shower was so long ago, I still want to share details of the event with everyone. This is a timeless, gender neutral and fun theme.

Today I'm sharing a special keepsake that was made for the baby.

But first...

How pretty is this quilt?! We oversaw a quilt program, where volunteers would make these quilts for our clients. Each piece of fabric has a different texture, making it a sensory piece. Mom-to-be loved these quilt squares. When the finished quilt came back, I took it and saved it to give to her at her shower.

I used the quilt to 'wrap' the keepsake in. So, what was this special keepsake?


Staff and volunteers were given a letter of the alphabet and tasked with creating a picture that represented that letter. For example, I had the letter 'N' so I drew (ok...traced) a Nurse. All the pages were then assembled to create an alphabet book for the baby. As with everything related to this shower, the book fit with the theme.

The book even included a picture drawn by mom. I had her and another co-worker do the 'Pig Personality Test', where you draw a pig (it's a real thing...google it) and I kept her drawing of the pig to include in the book. Mom was so surprised and touched to receive this book and that she was-unknowingly- part of the project too.

It was a little bit of a challenge to get everyone to draw/trace their pictures prior to the shower, but so worth it. I had the original pages colour copied and used the copies for the book, which was bound at Staples (a lot of office supple stores can do this).

What did I do with the originals? I kept them so that they could be copied in the future and made into books for others. 3 people on staff have received copies of this special book for their little ones.


This is the final post for the Bedtime Stories Baby Shower. It's been fun sharing different aspects of this event with everyone.

Over the next 2 weeks, I will be doing a four part series on one of my favourite events of the year!


Looking for more on the Bedtime Stories Baby Shower Series?
Theme & Invite
Decorations
Food & Drink
Games (& Prizes)
Book & Gift Ideas

Wednesday, 8 April 2015

DIY 'Sharpie' Mug

Happy Wednesday! I hope everyone is having a great week...mine has been a 'calm before the storm' type of week. But I'm happy to have some downtime and be able to spend this time in places that I love with people that I love. 

Today, I'm going to share a fun DIY project. There are so many pins and pictures on social media showing 'Sharpie Mugs/Plates/Bowls/Etc' and I really wanted to try this project out. I decided to make a custom mug.

Supplies:


  • Mug (purchased from the dollar store)
  • Permanent markers

Instructions:

  • Clean. I took off the sticker price tag from the store and washed my mug with dish soap and water. I would suggest doing this and running it through your dishwasher as well. Your mug needs to be CLEAN. I thought mine was clean, but there was some residue left by the sticker, which ended up being baked on to my mug. 
  • Decorate. I love this project because you can be as creative as you want, simple or complex. Since this was a test project, I decided to keep my 'design' simple. On one side I wrote 'Leading a life full of...' and on the other side I wrote 'Dreams and Colour'
  • Bake.  With the help of Google, I discovered that the mug should be baked at 350 for half an hour, which I did.
So, how did it turn out?


As you can see from the pictures, what was done in black marker turned out well. The blue, pink and red markers, although super light, are still readable. I made a mug for a friend and used a dark purple marker, which turned out similar to the blue used for 'Dreams'.

I did end up tracing everything and re-baking to see if that would make the colours stand out more, but it didn't.

Couple of things to note:

  • Not dishwasher safe. I put the mug in the dishwasher and everything more or less washed off.
  • Potentially microwave safe. I did put the mug in the microwave for about 45 seconds and I didn't notice a change to the marker colours. Full disclosure- I only did this once so I'm not sure what would happen if the mug is put in the microwave repeatedly. 
  • I know that this is called a 'Sharpie' mug but any type of permanent markers will work; Sharpie is a brand of permanent markers. I used Bic permanent markers.

The verdict?

While this is a super simple project that has the opportunity for tons of creativity and makes a great personalized gift, it really only works with black markers- which is fine, but I am a girl who LOVES colour. I have made a few of mugs for friends and they all loved them!


On the blog tomorrow...Bedtime Stories Baby Shower- Gifts & Book Recommendations.


Wednesday, 17 December 2014

Project Pinterest: Glitter Magnets

Back in the summer, I posted about thank you gifts I gave to my Summer Students, including a magnet board that I had made. I've made several magnet board but always struggle with magnets. I had yet to find something cute, something that would work with the board, something easy to make/find and something durable. 

I came across this pin (which originated here) and decided to make glitter magnets! This was such an easy project and turned out fantastic! All of the supplies came from the Dollar Store (making this a very cost effective project too). 
You will need:
  • Magnets (I used the round ones found in the crafting aisle)
  • Glitter glue
  • Sponge brush

How to make glitter magnets:
  • Put a drop of glitter glue in the middle of the magnet
  • Use the sponge brush to move the glue around the magnet until it is covered
  • Let the magnets dry
That's it! Because you are working with glue, you have to 'paint' the magnets before the glue dries. But this was still such a simple project and definitely something I will be doing again. Even though these magnets were made to go with the magnetic boards, I have made some to use on my kitchen fridge and my filing cabinet at work. I get tons of compliments on them and I have final solved the magnet issue for the boards!!

Friday, 30 November 2012

Project Pinterest- Magnet/Cork Board

I can't believe that today is the last day of November! This month has flown by and too quickly! One of my favourite things is that today is the last day of Movember- thank goodness!
Like every other person, I am addicted to Pinterest and I've decided to actually try and make some of my pins. My first Pinterest project was a magnet board. I couldn't find the original Pin, but you can find a similar one here (originally taken from here). 

I decided to modify the Pin and add a cork board as well. 

You will need:

  1. Magnets
  2. Fabric
  3. Hot glue gun
  4. Cookie Sheet
  5. Glue gun sticks
  6. Push pins
  7. Cork
All material, with the exception of the fabric, was purchased at The Dollar Store. The fabric, I picked up at a local quilting store.

I started by cutting the cork to fit half of the cookie sheet (I actually got my dad to do this).

Next, I covered the bottom part of the cookie sheet with a piece of fabric, gluing the fabric to the inside of the cookie sheet. I covered the cork in a different piece of fabric.

I then glued the cork to the fabric covered cookie sheet.

The final, and most challenging, part of this project was the magnets. I would suggest just buying magnets you like, so much easier. But I covered the magnets in fabric. After several attempts and methods, I just cut circles in the fabric and glued the circle on top of the magnet.

The finished product:


I originally wrote about this project back in February, as one of my Favourite Things. You can find my original post here.

Friday, 24 February 2012

Favourite Thing- DYI Magnetic Board

Anyone who knows me, knows that I am not a DIY-er, crafty, organized, neat or even patient for that matter.

I recently came across a DIY magnetic board on Pinterest (you can see the original post here) and thought that was maybe something I could make. You could even say I was inspired. I thought it seemed pretty easy and thought I would step it up a notch and make a half magnet board, half cork board.

So, a week ago, I set out on my little project.

The supplies:


Fabric:

There is a quilting store in town. I had to drop something off there for work, and while there I decided to look at the fabric. I ended up finding a bundle for 4 fabrics, which I thought were reasonable priced ($15 for 4 pieces, all big each big enough to make a pillow case) and I was drawn to two of the fabrics. Honestly, it was finding these fabrics by chance that resulted in my attempting this project.
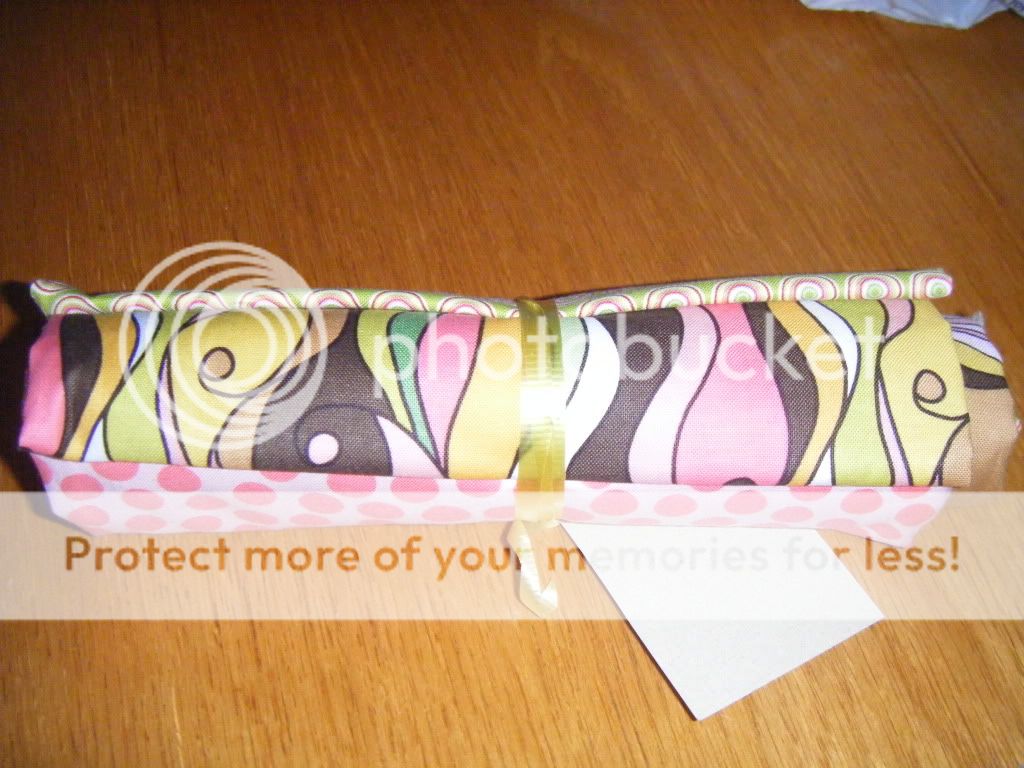


I LOVE the pink polka dot fabric and the green fabric with polka dots.
Next, I was off to the dollar store where I picked up:


Craft Magnets


Cork board (the package had two boards in it)


Push pins (for the cork board)


Hot glue gun (which I didn't buy at the Dollar Store) & hot glue gun sticks


Cookie sheets (aka baking sheets)
Next stop was home to attempt to be a crafty DIY-er.

To make:
  1. Cut cork board to desired size
  2. Wrap fabric around cork board, secure with hot glue
  3. Wrap fabric around cookie sheets- the bottom of the sheet will be the front of the magnet/cork board- secure with hot glue
  4. Glue cork board to cookie sheet
  5. If needed, make magnets and/or push pins

     
Seems pretty simple (and it was, for the most part).

Luckily, my dad came to visit for the weekend. He actually was kind enough to cut the cork board for me. I wraped the cork board in the pink polka dot fabric and I wrapped the entire cookie sheet in the green fabric.
The biggest challenge for me (besides being patient during the project and trying not to get hot glue everywhere) was the magnets.

I wasn't really sure how to go about making magnets. I originally tried wrapping the entire magnet in fabric, which didn't work well. I then tried wrapping a button in fabric and then gluing the button to the magnet. This worked better but wasn't great (not to mention I didn't have any more extra buttons kicking around). In the end, I cut out a square piece of fabric, glued it to the magnet and then cut the extra fabric to make the fabric round. Again, not the best, but better.

This was my final product:
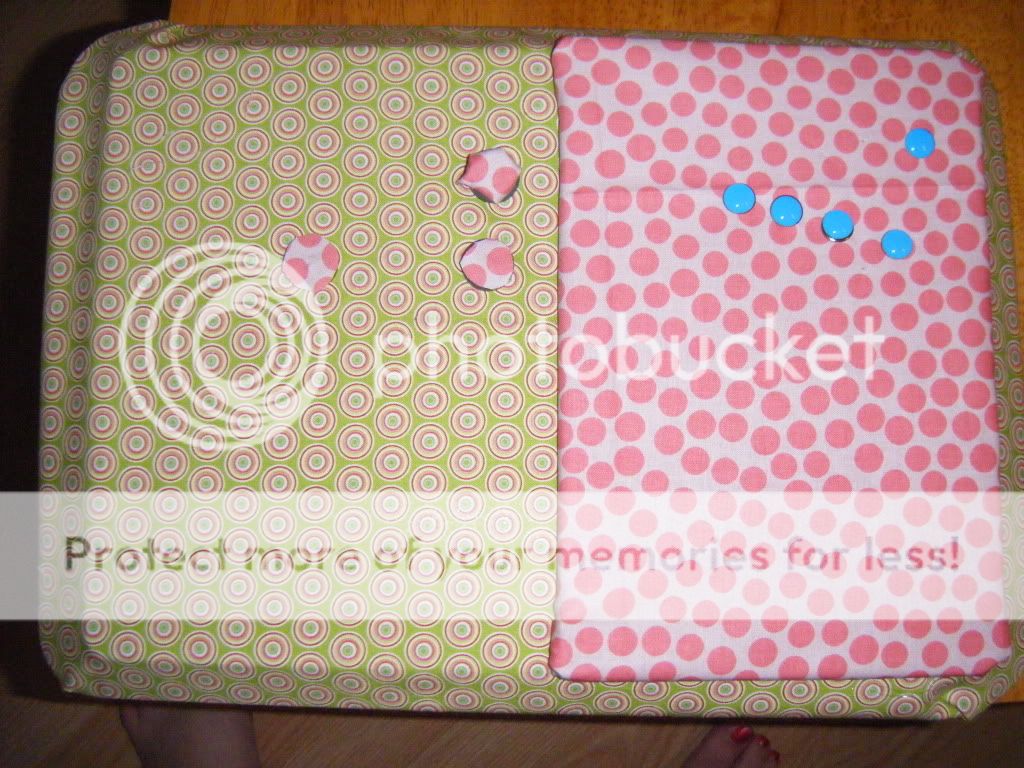

It's not perfect, but I think it turned out pretty good for a first attempt!
The magnet on the upper right is the button magnet. 

My dad (bless his heart) agreed to attempt to be crafty with me. This is what he came up with:


A bit different then mine.
As you can see, my dad glued the fabric on the inside of the cookie tray and then glued his piece of cork on top.
He also made his own magnets- he glued screws on to the magnets so they would have 'handles' and be.


To summarize: My favourite thing this week is my homemade magnet/cork board. NOT DIY projects.

Although after this, I think I might have to attempt some more DYI projects.